
Disclosure: This page contains affiliate links. As an Amazon Associate, I earn from qualifying purchases at no additional cost to you.
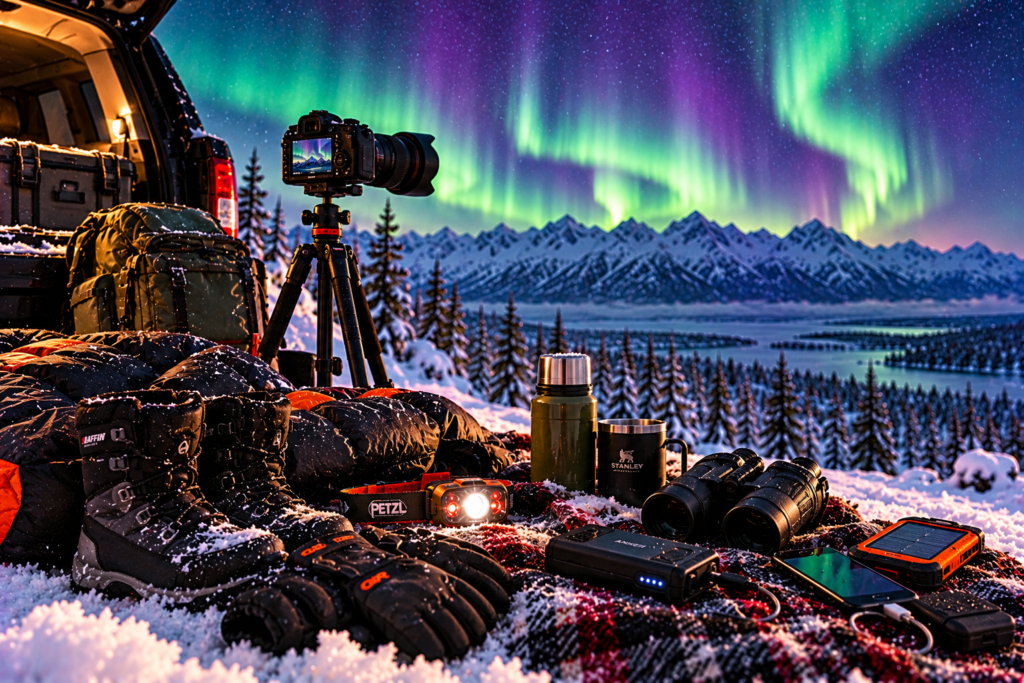
There's something about seeing the northern lights in Alaska that never really gets old.
One minute you're standing beneath a dark winter sky, wondering whether anything is going to happen. Then a faint green glow begins to appear, slowly stretching across the horizon. Sometimes it fades away. Other times, the sky comes alive with curtains of green, purple, and even red moving overhead.
It's one of those experiences that can make you forget just how cold you are.
And that's exactly why preparing for northern lights viewing in Alaska matters.
Unlike many winter activities where you're constantly moving, watching the aurora often involves standing outside for extended periods. You may spend an hour or more waiting for the lights to appear, and much of that time can be spent standing relatively still.
That's a very different experience from walking around town or taking a short winter hike.
In Interior Alaska, temperatures during the northern lights viewing season can drop well below zero. Even when the air temperature doesn't seem particularly extreme, wind, snow, and prolonged exposure can make an outing uncomfortable or dangerous if you're not properly prepared.
The good news is that you don't need an enormous amount of specialized equipment to enjoy the northern lights. You need the right clothing system, reliable lighting, a few practical accessories, and a realistic understanding of the conditions.
In this guide, we'll look at six useful northern lights viewing gear options for Alaska, explain how to dress for long periods outdoors, and cover the practical details that can make your aurora experience safer and more enjoyable.
Quick Navigation
- Quick Picks
- Best Northern Lights Viewing Gear
- Northern Lights Gear Comparison Chart
- How to Dress for Northern Lights Viewing
- Northern Lights Viewing Conditions in Alaska
- Northern Lights Photography Tips
- Northern Lights Viewing Safety
- Northern Lights Packing Checklist
- Buying Guide & Frequently Asked Questions
- Related Alaska Winter Gear Guides
- Final Thoughts
Quick Picks
- Best Headlamp for Aurora Viewing: Fenix HM55R Rechargeable Headlamp
- Best Portable Power Bank: Anker 737 Power Bank
- Best Disposable Hand Warmers: HotHands Hand Warmers
- Best Extreme-Cold Winter Boots: Baffin Impact Winter Boots
- Best Thermal Base Layer: Smartwool Classic Thermal Merino Base Layer
- Best Photography Gloves: Palmyth Photography Gloves
These products cover several important parts of a northern lights viewing setup. You'll still need appropriate outerwear, insulated pants, a warm hat, face protection, and other equipment suited to the weather.
Best Northern Lights Viewing Gear for Alaska
When you're preparing for an aurora outing, think about the entire experience rather than focusing on one piece of equipment.
You'll need to stay warm while standing still, move safely in darkness, and protect your electronics from cold temperatures. If you're planning to photograph the northern lights, you'll also want equipment that allows you to operate your camera without exposing your hands to freezing air for long periods.
Best Headlamp for Aurora Viewing: Fenix HM55R Rechargeable Headlamp
One of the most useful things you can bring on a northern lights outing is a dependable headlamp.
Aurora viewing often takes place away from streetlights and developed areas, where the darkness makes it easier to see faint activity in the sky.
But that also means you need a safe way to navigate parking areas, snowy trails, and uneven ground.
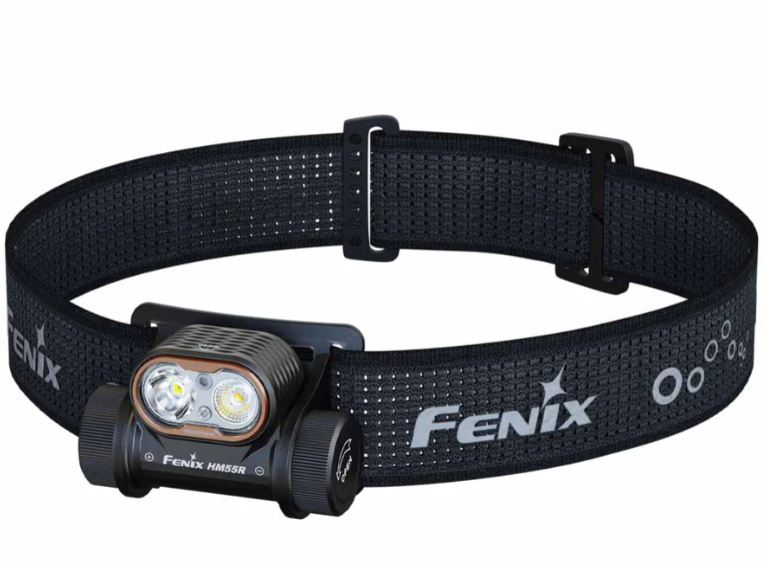
The Fenix HM55R Rechargeable Headlamp is a versatile lighting option for Alaska winter activities, including northern lights viewing.
One of the advantages of a headlamp is that it keeps your hands free. That's particularly useful if you're carrying a camera bag, adjusting a tripod, or setting up photography equipment.
However, when you're watching the northern lights, brighter isn't always better.
Using excessive white light can interfere with your dark adaptation and disturb other viewers or photographers nearby.
Choose an appropriately low brightness setting whenever possible, and confirm the exact model's lighting modes if a red-light function is important to you.
Because rechargeable batteries can lose usable capacity in extreme cold, carry backup lighting and protect spare power sources from unnecessary exposure.
Best for: Walking safely to viewing locations, setting up photography equipment, and hands-free lighting during aurora outings.
Check Price on Amazon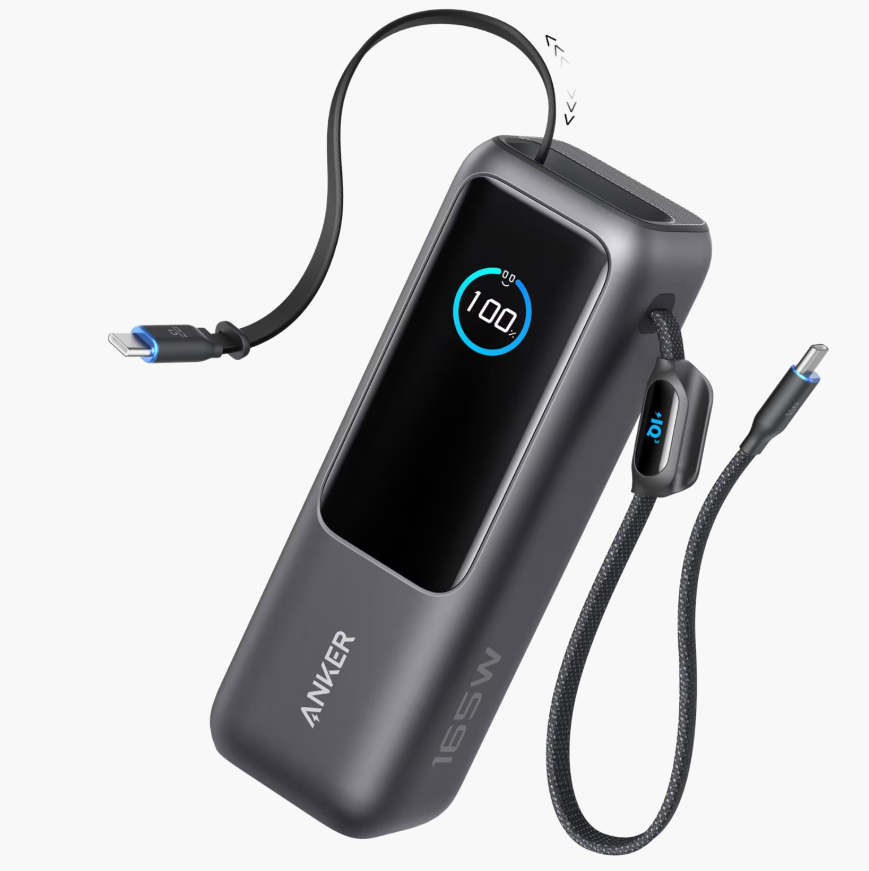
Best Portable Power Bank: Anker 737 Power Bank
Cold weather and electronics don't always get along.
During an Alaska northern lights outing, your phone, camera accessories, and other rechargeable devices may experience reduced battery performance when exposed to freezing temperatures.
That's where carrying a portable power bank can be useful.
The Anker 737 Power Bank is a high-capacity portable charging option worth considering for winter travel and photography.
For northern lights outings, a power bank can help recharge compatible electronics when you're away from an electrical outlet.
That may be particularly helpful if you're using your phone for navigation, checking aurora forecasts, or operating compatible photography accessories.
However, don't assume that every camera can be powered or charged directly from a power bank. Compatibility depends on the camera and its charging system.
Cold temperatures can also affect the power bank itself. Keep it within its manufacturer-approved operating range and avoid charging lithium-ion batteries below their permitted temperature.
For outdoor use, protecting the power bank from snow and moisture is important as well.
Best for: Charging compatible phones, photography accessories, and other portable electronics during Alaska winter outings.
Check Price on Amazon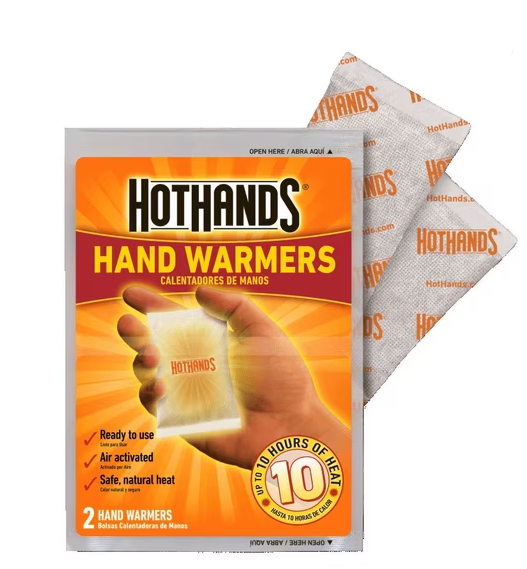
Best Disposable Hand Warmers: HotHands Hand Warmers
One of the biggest challenges of northern lights viewing is keeping your hands warm while you're standing outside.
When you're walking or hiking, your body generates heat through movement. But when you're standing still waiting for the aurora, your hands can become uncomfortable much more quickly.
HotHands Hand Warmers are disposable, air-activated warming products that can provide supplemental warmth during cold-weather activities.
They're compact enough to carry in a coat pocket or winter gear bag, making them convenient for northern lights outings.
For photographers, hand warmers can be especially useful because operating a camera often requires more finger movement than bulky mittens allow.
However, hand warmers aren't a substitute for properly insulated gloves or mittens.
They should be used according to the manufacturer's instructions, including any restrictions on direct skin contact, use while sleeping, or use by people with reduced temperature sensitivity.
For extended outdoor viewing, I recommend prioritizing warm mittens and using hand warmers as supplemental comfort rather than your primary source of hand protection.
Best for: Supplemental hand warmth during aurora viewing, winter photography, and extended periods outdoors.
Check Price on Amazon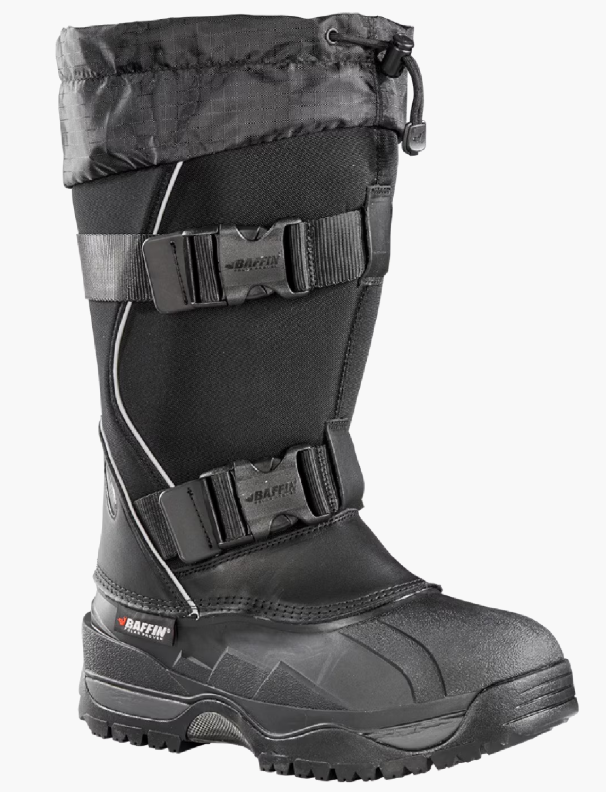
Best Extreme-Cold Winter Boots: Baffin Impact Winter Boots
If there's one area where you don't want to underestimate Alaska winter temperatures, it's your feet.
Standing outside for northern lights viewing can be very different from walking around in ordinary winter boots.
When you're standing still, your feet aren't generating as much warmth through movement, and cold can gradually become uncomfortable even when the rest of your clothing feels adequate.
The Baffin Impact Winter Boots are designed for demanding cold-weather conditions and are worth considering for people who expect prolonged exposure to severe winter temperatures.
For northern lights viewing in Interior Alaska, substantial insulation can be especially valuable.
However, proper fit matters just as much as insulation. Boots that are too tight can restrict circulation and make your feet feel colder.
Leave enough room for appropriate winter socks without creating an excessively loose fit that makes walking difficult.
Also remember that warm boots don't necessarily provide sufficient traction on smooth ice. Depending on the conditions, you may need compatible removable ice cleats.
Before purchasing, review the manufacturer's sizing guidance, insulation specifications, and intended conditions.
Best for: Prolonged northern lights viewing, very cold winter nights, and activities involving extended periods of standing outdoors.
Check Price on Amazon
Best Thermal Base Layer: Smartwool Classic Thermal Merino Base Layer
Staying warm while watching the northern lights starts long before you put on your winter coat.
Your base layer is the foundation of your clothing system because it sits against your skin and helps manage moisture.
The Smartwool Classic Thermal Merino Base Layer is a merino wool option worth considering for cold-weather activities.
Merino wool is commonly used in winter clothing because it provides insulation while helping manage moisture next to the skin.
That's important during northern lights outings because you may alternate between walking to your viewing location and standing still for long periods.
If you become sweaty while moving, damp clothing can make you feel much colder once you stop.
A proper layering system helps address that problem by combining moisture-managing base layers, insulating mid layers, and weather-appropriate outerwear.
For extremely cold nights, consider thermal layers for both your upper and lower body rather than relying entirely on an insulated jacket.
Make sure your clothing fits comfortably and doesn't restrict circulation or movement.
Best for: Building a cold-weather layering system for northern lights viewing, winter travel, and outdoor recreation.
Check Price on Amazon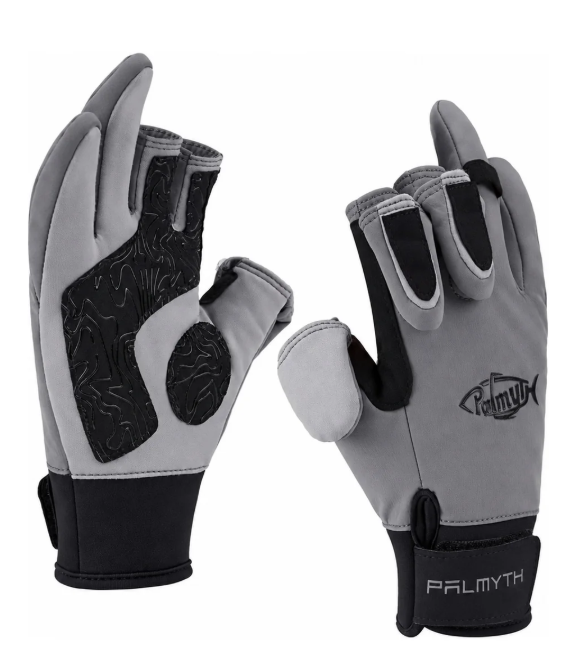
Best Photography Gloves: Palmyth Photography Gloves
Photographing the northern lights presents a challenge that anyone who has tried operating a camera in cold weather can appreciate.
You need enough finger movement to adjust settings, change lenses, and operate your camera, but exposing your hands to freezing temperatures can become uncomfortable very quickly.
Palmyth Photography Gloves are designed with photographers and outdoor users in mind, offering an alternative to ordinary bulky winter gloves.
For northern lights photography, the goal is to find a balance between warmth and dexterity.
Gloves that allow easier access to camera controls may be useful during setup and adjustments, particularly when you're working with small buttons or dials.
However, photography gloves aren't automatically warm enough for extended periods of inactivity in severe Alaska cold.
For very cold conditions, I recommend using them as part of a broader hand-protection system that includes appropriately insulated mittens or overmitts.
That way, you can uncover your fingers only when necessary and restore insulation between camera adjustments.
Before purchasing, verify the exact glove model's design, sizing, and intended temperature conditions.
Best for: Northern lights photography, camera adjustments, and outdoor activities requiring more finger dexterity.
Check Price on AmazonNorthern Lights Viewing Gear Comparison Chart
These six products serve different purposes during an aurora outing. Click each product name to view its Amazon listing.
| Product | Category | Best Use | Important Consideration |
|---|---|---|---|
| Fenix HM55R | Headlamp | Hands-free lighting | Use low brightness when appropriate |
| Anker 737 Power Bank | Portable power | Charging compatible electronics | Protect from extreme cold |
| HotHands Hand Warmers | Supplemental warmth | Keeping hands comfortable | Follow safe-use instructions |
| Baffin Impact Boots | Winter footwear | Standing in severe cold | Fit and traction matter |
| Smartwool Classic Thermal Merino Base Layer | Thermal clothing | Base-layer insulation | Pair with appropriate outerwear |
| Palmyth Photography Gloves | Hand protection | Camera operation | May need warmer overmitts |
How to Dress for Northern Lights Viewing in Alaska
One of the most important things to understand about northern lights viewing is that you'll often be standing still.
That means you may need more insulation than you would for an active winter hike at the same temperature.
Start with Thermal Base Layers
Choose moisture-managing base layers made from merino wool or appropriate synthetic materials.
For cold conditions, consider both thermal tops and bottoms.
Add Insulating Mid Layers
Fleece, wool, and other insulating layers can help retain warmth beneath your outerwear.
Adjust the amount of insulation based on the temperature, wind, and expected duration outdoors.
Wear a Proper Winter Jacket and Insulated Pants
For very cold nights, a substantial insulated jacket or parka and appropriate insulated pants or bibs can make a significant difference.
Make sure your outerwear blocks wind and provides enough coverage when you're standing or sitting outside.
Protect Your Feet
Warm winter boots and appropriate socks are essential for extended outdoor viewing.
Avoid overly tight footwear, and consider additional insulation when you'll be standing on frozen ground for long periods.
Use a Layered Hand-Protection System
For photographers, consider gloves that allow camera adjustments along with warmer mittens or overmitts for periods when you're not operating equipment.
Cover Your Head, Neck, and Face
A warm hat, neck gaiter, or balaclava can help protect exposed skin from cold air.
During severe cold or windy conditions, frostbite can develop on exposed skin, so don't overlook face protection.
Northern Lights Viewing Conditions in Alaska
The northern lights can occur throughout the year, but you need sufficiently dark skies to see them clearly.
In Alaska, the main viewing season generally runs from late August into April, although actual visibility depends on location, darkness, cloud cover, and auroral activity.
Interior Alaska
Fairbanks and surrounding Interior Alaska communities are popular aurora-viewing destinations because they offer long periods of winter darkness and access to areas away from city lights.
However, Interior winter temperatures can be extremely cold, making proper clothing and emergency preparation essential.
Southcentral Alaska
Anchorage and other Southcentral communities can experience visible northern lights when conditions cooperate.
Cloud cover, local lighting, and auroral activity all influence visibility.
Travelers may need to seek darker locations, but should avoid unsafe roads or unfamiliar terrain in pursuit of a better view.
Northern Alaska
Communities farther north experience very long periods of winter darkness, including polar night above the Arctic Circle.
However, extreme weather, limited road access, and remote conditions can make aurora outings more demanding.
Cloud Cover and Light Pollution
Even strong auroral activity may be impossible to see beneath thick clouds.
Artificial lighting can also make faint aurora displays harder to distinguish.
For the best viewing opportunities, consider the forecast, cloud conditions, moonlight, and access to safe locations with darker skies.
Northern Lights Photography Tips for Alaska
Photographing the northern lights can be incredibly rewarding, but winter conditions add challenges beyond ordinary nighttime photography.
Use a Stable Tripod
A sturdy tripod helps keep your camera steady during longer exposures.
Make sure the tripod is positioned securely and won't slip on ice or sink into loose snow.
Start with Manual Camera Settings
If your camera supports manual controls, a useful starting point may include a wide aperture, a relatively high ISO, and an exposure of several seconds.
These aren't fixed settings. Bright, fast-moving auroras often require shorter exposures than faint, slow-moving displays.
Review your images and adjust according to the actual conditions.
Use Manual Focus When Necessary
Autofocus can struggle in darkness.
Depending on your camera, manually focusing on a distant bright star or other suitable reference point may help achieve sharper images.
Protect Your Camera Batteries
Cold weather can reduce battery performance.
Carry compatible spare batteries and keep them protected from extreme cold when possible.
Manage Condensation
Moving cold camera equipment directly into a warm, humid environment can cause condensation.
Use appropriate equipment-handling practices, such as allowing the camera to warm gradually inside a closed bag when recommended by the manufacturer.
Be Considerate with Headlamps
Bright white light can disrupt other people's photographs and night vision.
Use the lowest practical lighting level and avoid shining your headlamp toward other photographers.
Northern Lights Viewing Safety in Alaska
Check the Weather Before Leaving
Review current temperatures, wind, snowfall, and road conditions before traveling to a viewing location.
Remember that a forecast suitable for a short walk may not be appropriate for standing outdoors for several hours.
Choose Safe Viewing Locations
Avoid stopping along narrow road shoulders, blocking traffic, or parking where other drivers may not see you.
Use established parking areas and legal public access points whenever possible.
Prepare Your Vehicle
If you're driving to a remote viewing location, carry an appropriate winter vehicle emergency kit.
Make sure your vehicle is suitable for the road conditions and has sufficient fuel.
Watch for Ice and Uneven Ground
Darkness can make slippery surfaces difficult to identify.
Use a headlamp and consider appropriate traction devices for icy conditions.
Recognize Cold-Related Warning Signs
Numbness, persistent shivering, confusion, unusual fatigue, or loss of coordination can indicate dangerous cold exposure.
Don't ignore symptoms or continue standing outside simply because the northern lights might appear.
Seek warmth promptly and obtain emergency help for suspected hypothermia or serious frostbite.
Don't Wander into Unfamiliar Terrain
A beautiful aurora display can be distracting, especially when you're looking upward instead of watching where you're walking.
Stay aware of your surroundings, including roads, steep drop-offs, open water, and wildlife.
Northern Lights Viewing Packing Checklist
- Thermal base layers for upper and lower body
- Insulating mid layers
- Weather-appropriate winter parka
- Insulated winter pants or bibs
- Warm winter boots and appropriate socks
- Insulated mittens or gloves
- Photography gloves if using a camera
- Warm hat, neck gaiter, and face protection
- Hand warmers for supplemental warmth
- Headlamp and backup lighting
- Charged phone and compatible power bank
- Camera and sturdy tripod if photographing the aurora
- Compatible spare camera batteries
- Appropriate traction devices for icy surfaces
- Warm beverages in a suitable insulated container
- Winter vehicle emergency supplies when driving
- Weather forecast and safe return plan
Buying Guide & Frequently Asked Questions
What should I wear to see the northern lights in Alaska?
Wear moisture-managing base layers, insulating mid layers, a weather-appropriate winter jacket, insulated pants, warm boots, gloves or mittens, and protection for your head and face.
Plan for standing still rather than continuous activity.
Do I need special northern lights viewing gear?
You don't necessarily need equipment designed specifically for aurora viewing. Good cold-weather clothing, reliable lighting, and practical accessories are usually more important.
How cold does it get when viewing the northern lights in Fairbanks?
Fairbanks can experience temperatures well below zero during the winter aurora season, although conditions vary from night to night.
Check the current forecast rather than assuming a typical temperature.
What are the best boots for northern lights viewing?
Choose insulated winter boots appropriate for the temperature and duration outdoors. The Baffin Impact is one option worth considering for severe cold.
Proper fit and adequate traction are also important.
Are hand warmers worth bringing?
Yes. Hand warmers can provide supplemental warmth, particularly when you're standing still or operating photography equipment.
They shouldn't replace properly insulated gloves or mittens.
Do I need a headlamp for northern lights viewing?
A headlamp is useful for navigating dark parking areas, setting up equipment, and returning safely to your vehicle.
Use low brightness when possible to avoid disturbing other viewers.
Is red light better for aurora viewing?
Low-output red light can help preserve dark adaptation and reduce disruption to nearby photographers, but it should still be used sparingly.
Can I see the northern lights without a camera?
Absolutely. The northern lights can be visible to the naked eye when conditions are favorable.
However, cameras can sometimes capture colors and details that appear fainter to human vision.
Do I need a professional camera?
No. Many modern smartphones can capture aurora photographs under suitable conditions, although dedicated cameras with manual controls can offer greater flexibility.
Should I bring a tripod?
A tripod is highly recommended for longer-exposure northern lights photography because it helps keep your camera steady.
Will my phone battery die faster in the cold?
Cold temperatures can reduce usable battery capacity. Keep your phone protected from extreme cold when possible and carry backup power.
When is the best time of year to see the northern lights in Alaska?
The main viewing season generally extends from late August through April, when nights are sufficiently dark.
Visibility depends on auroral activity, cloud cover, and local conditions.
What time do the northern lights appear?
Auroral activity can occur at different times throughout the night. There is no guaranteed viewing hour.
Check current forecasts and be prepared to wait.
Can I see the northern lights in Anchorage?
Yes. The northern lights can be visible around Anchorage when auroral activity, darkness, and weather conditions cooperate.
Light pollution and cloud cover may affect visibility.
Is Fairbanks better than Anchorage for northern lights viewing?
Fairbanks is often a strong choice because of its geographic location, long winter darkness, and access to darker viewing areas.
However, no destination can guarantee a display, and weather remains an important factor.
How long should I plan to stay outside?
That depends on the weather, viewing conditions, and your comfort and safety.
Prepare for a potentially extended wait, but take warming breaks and leave when conditions become unsafe.
Can I view the northern lights from my car?
Yes. A vehicle can provide shelter between viewing periods, provided you're parked legally and safely.
Never idle a vehicle where snow or other obstructions could block the exhaust system, and avoid creating hazards for other road users.
What's the biggest mistake visitors make when viewing the northern lights?
One common mistake is underestimating how cold it can feel while standing still for extended periods.
Dress for the actual conditions, bring appropriate gear, and remember that your safety matters more than staying outside for one more photograph.
Final Thoughts
Seeing the northern lights in Alaska is one of those experiences that can stay with you for the rest of your life.
There's something incredible about standing beneath a dark winter sky and watching the aurora move overhead. Sometimes the lights are faint and quiet. Other times, they're so active that it's difficult to know where to look first.
But the experience is much more enjoyable when you're properly prepared.
Warm boots, thermal layers, insulated outerwear, dependable lighting, and a few practical accessories can make a tremendous difference when you're spending time outside in Alaska's winter conditions.
If you're planning to photograph the northern lights, remember to protect your hands and batteries from the cold and give yourself time to become familiar with your camera before heading outside.
And don't forget that the northern lights don't operate on a schedule. Some nights you'll see an incredible display, while others may be quiet or completely clouded over.
Prepare for the weather, choose a safe viewing location, and be patient.
When the lights finally appear, you'll be glad you took the time to get ready.